Seamless: Difference between revisions
No edit summary |
m (→Contact) |
||
| (One intermediate revision by the same user not shown) | |||
| Line 148: | Line 148: | ||
===Noise=== | ===Noise=== | ||
Creates tileable voronoise according to the given parameters.<ref>[https://iquilezles.org/articles/voronoise]</ref> | Creates tileable voronoise according to the given parameters.<ref>[https://iquilezles.org/articles/voronoise Voronoise]</ref> | ||
===Voronoi=== | ===Voronoi=== | ||
| Line 160: | Line 160: | ||
===Caustics (since version 4.0)=== | ===Caustics (since version 4.0)=== | ||
Creates a tileable fractal caustics noise according to the given parameters. Supports up to 8 octaves.<ref>[https://www.shadertoy.com/view/wlc3zr]</ref> | Creates a tileable fractal caustics noise according to the given parameters. Supports up to 8 octaves.<ref>[https://www.shadertoy.com/view/wlc3zr ShaderToy - Caustics]</ref> | ||
===Erosion (since version 4.0)=== | ===Erosion (since version 4.0)=== | ||
Creates a tileable fractal hydrolic erosion noise according to the given parameters. Supports up to 8 octaves.<ref>[https://www.shadertoy.com/view/MtGcWh]</ref> | Creates a tileable fractal hydrolic erosion noise according to the given parameters. Supports up to 8 octaves.<ref>[https://www.shadertoy.com/view/MtGcWh ShaderToy - Erosion]</ref> | ||
===Export=== | ===Export=== | ||
| Line 206: | Line 206: | ||
==Contact== | ==Contact== | ||
Feel free to contact me via e-mail: [mailto: | Feel free to contact me via e-mail: [mailto:support@leochaumartin.com support@leochaumartin.com] | ||
==References== | ==References== | ||
<references /> | <references /> | ||
Latest revision as of 00:14, 13 February 2024
Seamless is a powerful graph builder integrated in the Unity Editor. It allows
you to bake beautiful procedural textures from noise or geometric primitives,
coupled with mathematical operations, image filters, etc.
Seamless works natively with any render pipeline on any Unity version above
2018.1.
Setup
The whole package is contained in the Seamless folder resulting from the import. You can move it wherever you want, but it is recommended to keep the same folder structure.
Basics
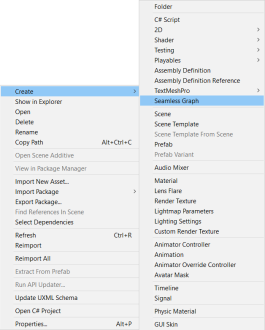
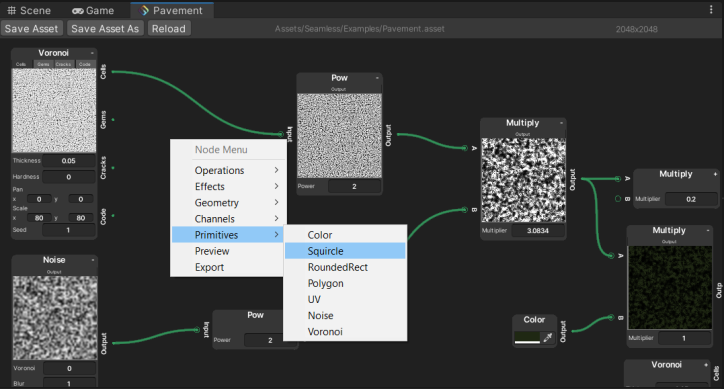
You can create a new Seamless graph from the right-click context menu in the project window.
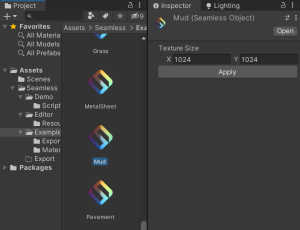
Each graph is saved as a SeamlessObject in a .asset file. You can recognize
them with the seamless logo. You can change the texture size from the inspector.
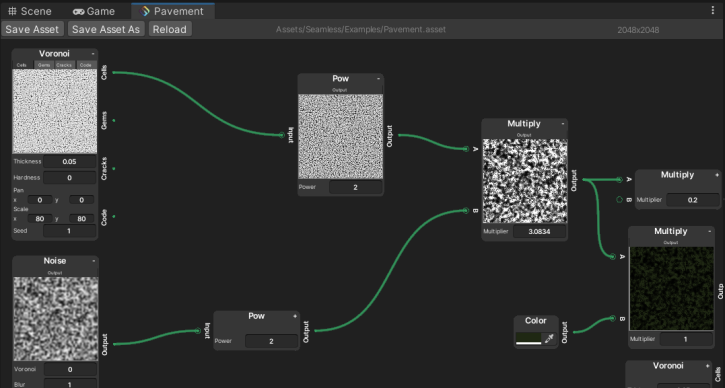
You can open a graph by double-clicking on it. On Unity 2019.2 and above, the window will try dock itself next to the scene window, otherwise it will appear as a floating window, that you can dock manually.
The navigation in the main canvas is similar to other graph editors such as Shadergraph or the animator. You can zoom in/out using scroll wheel, move by click & drag on the mouse scroll wheel. Nodes can be selected by clicking on it, or by drawing a selection rectangle. You can drag selected nodes to move them.
You cannot select or interact with links : they are 100% visual. To add a link, you must click and drag from an output, links cannot be created backwards. To remove a link you must remove one of the nodes it connect, or connect another link to the same output node. There is a header on the top of each window containing information and buttons to save, save as, and reload the graph.
To create a new node, just right click on the canvas and a context menu will appear. You can also start building a link and releasing the mouse left button in a free space, the same context menu will appear and the link will be associated with the first input (if there is any) of the added node.
Some nodes contain one or several parameters. You can change their value as a text edit or as a slider with the mouse.
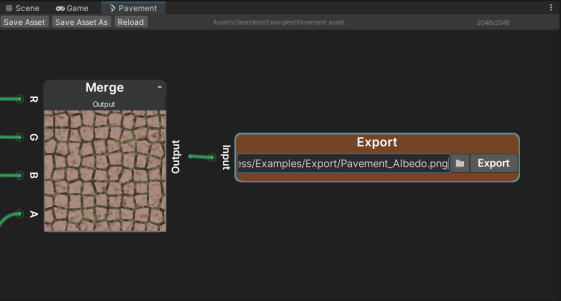
Once you are happy with a result, you can export it as a static image using an Export node. You can use as many Export nodes as you want. So far, Seamless only supports PNG export.
You can browse the path by clicking on the Folder icon. Make sure you select a path included in the Assets folder of your project.
Since version 4.0, you can change the default export path via Edit->Preferences->Seamless.
Nodes list
Preview
Does nothing. Displays the input as it is.
OneMinus
Computes the negative or R, G and B. Keep Alpha untouched.
Add
Adds A and B channel-wise. Clamps automatically between 0 and 1.
Subtract
Subtracts A and B channel-wise.
Multiply
Multiplies A and B channel-wise. A multiplier float field let you ajust the result.
Pow
Applies the mathematical power function to Input with a float exponent.
Divide
Divides A by B channel-wise.
Clamp
Clamps Input between Min and Max float parameters.
Step
Binarizes the input channel-wise, using a float edge between 0 and 1.
Lerp (since version 2.1)
Perform a linear interpolation from A to B according to T channel-wise.
Hash (since version 3.1)
Perform a hashing of the input channel-wise. Simple way to randomize the input.
Gradient (since version 4.0)
Interprets the Input's red channel as the time for an user defined gradient. Uses Unity's native gradient picker.
Blur
Applies Gaussian Blur to the input, using a float radius and an integer steps number parameters.
EdgeDetection
Performs the input’s edge detection. You can adjust the steps number in pixels.
Normal
Computes normal map from a given heightmap. Only the red channel of the input is considered. You can adjust the strength of the normal effect with a float parameter.
Barrel
Applies Barrel Distortion algorithm to the input. The power is controlled by a float parameter.
Spherize
Maps the input on a sphere.
Curvature
Computes the curvature of the input. Useful for ambient occlusion estimation.
Luminance (since version 3.1)
Computes the grayscale luminance of the colored input. Dot product of (R,G,B) with (0.299, 0.587, 0.114)
Posterize (since version 3.2)
Applies a linear toon shading effect of the input.
TilingOffset
Tiles and/or offsets the input following the given parameters.
Rotate
Rotates the input of the given angle in degrees.
HFlip
Flips the input horizontally.
VFlip
Flips the input vertically.
Splatter (since version 3.0)
Splatters an Input following a grid size and randomizes its local position, rotation and scale following the given parameters.
Warp (since version 3.0)
Warps an Input following to the given direction : Red channel for horizontal warp and green channel for vertical. Direction's blue and alpha channels are ignored. The intensity can be controlled with the Multiplier parameter.
Split
Splits the 4 channels of the input into 4 B&W outputs.
Merge
Creates a RGBA output from 4 inputs. Only the red channel of each input is considered.
Color
Outputs a uniform color determined by a color picker.
RenderTexture
Outputs the given RenderTexture. If the render texture size is different than the one defined in the graph settings, the input texture will appear bigger/smaller accordingly on the children nodes.
Squircle
Creates a squircle according to the given parameters.
RoundedRect
Creates a rounded rectangle. Useful for capsule too.
Polygon
Creates a polygon according to the given parameters
UV
Creates a UV gradient. Horizontal linear gradient in R, vertical linear gradient in G, 0 in B and 1 in A.
Noise
Creates tileable voronoise according to the given parameters.[1]
Voronoi
Creates tileable voronoi noise according to the given parameters. Additionnal corollary outputs are also provided.
FractalNoise (since version 2.0)
Creates a tileable fractal IQ Noise according to the given parameters. Supports up to 8 octaves.
FractalWarp (since version 2.0)
Creates a tileable fractal warp based on IQ Noise according to the given parameters. Supports up to 8 octaves.
Caustics (since version 4.0)
Creates a tileable fractal caustics noise according to the given parameters. Supports up to 8 octaves.[2]
Erosion (since version 4.0)
Creates a tileable fractal hydrolic erosion noise according to the given parameters. Supports up to 8 octaves.[3]
Export
Let the user export a PNG image from the input. The image will have the same size as in the graph settings. If you export a normal map, don’t forget to apply the right import settings, Seamless won’t do it automatically.
Tips and tricks
Make an existing picture seamlessly tileable
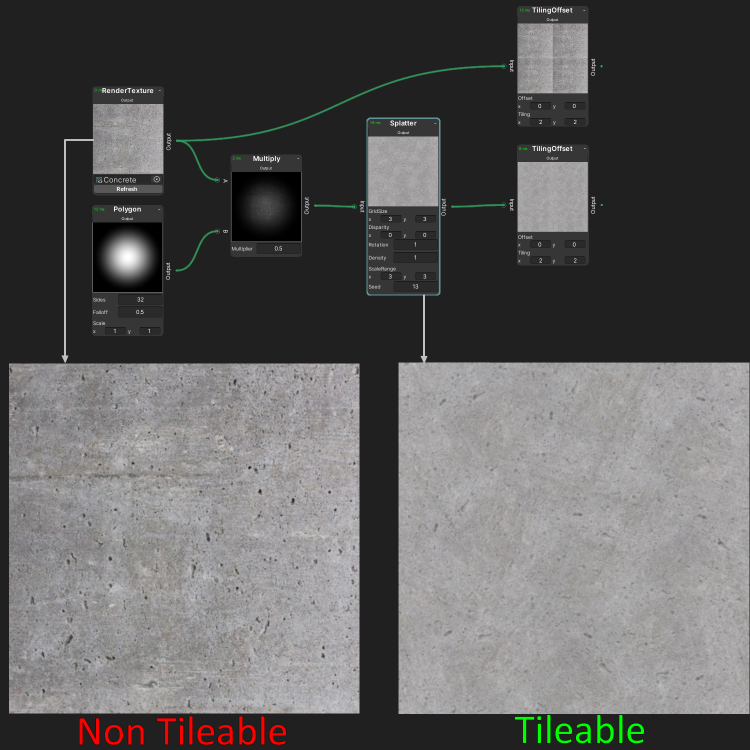
Seamless main use case is procedural texture generation, but you can also use existing pictures and make them tileable thanks to the Splatter node. Here is how:
- Create a CustomRenderTexture and sets its Initialization and update modes on OnLoad or Realtime according to your needs, and set your custom picture in the initialization texture field.
- Make sure the CustomRenderTexture is the same size than the graph you want to use it in.
- Create a new SeamlessGraph.
- Add a RenderTexture node and plug the CustomRenderTexture.
- Multiply it with a 0.5 falloff, 32 sided polygon to fade the borders. Also, you should dim the result with the multiplier parameter to avoid overexposure later.
- Plug it as a Splatter node Input. As long as you keep low scales (lower than 3), the output is guaranteed to be tileable. For higher scales, some seams may appear, or not, it depends on your input picture.
- You can play with different parameters to fit your needs.
Troubleshooting
The node preview looks brighter than usual
You are probably using linear color space instead of gamma. Don't worry, the textures will contain exactly the same data, it is just displayed differently on the screen.
Legacy RP use gamma color space by default while URP and HDRP use linear by default.
You can switch the color space in Edit->Project Settings->Player->Other Settings but be careful, if will change the visual aspect of your whole game.
All my nodes turned gray when I opened the graph
You probably left the graph's tab for a while and Unity unloaded the render textures to save up memory. Click on the reload button.
The preview material is pink
This issue can happen when switching scenes. Try to re-open the graph.
The preview material looks overexposed and unlit when the metallic value goes below 1
This is a know issue in HDRP only. With a merge node, set a color whose green channel equals 0 in the occlusion slot (the actual occlusion is controlled by the red channel).
The preview material displays the normal map in the wrong way
Make sure your normal map alpha channel is not 0. Otherwise, the standard shader will try to unpack an already unpacked normal map.
Contact
Feel free to contact me via e-mail: support@leochaumartin.com
